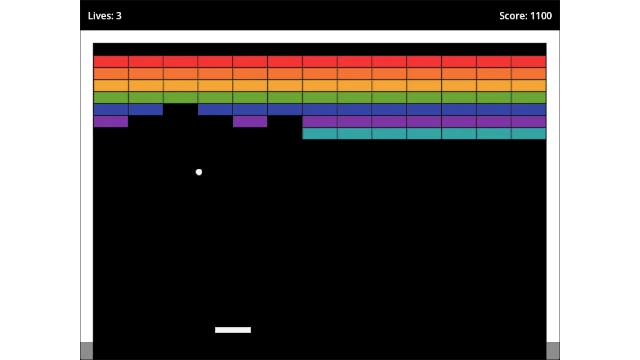
To reiterate from my previous godot related post (pong). I'm no expert with the Godot Engine; I'm just documenting my journey as I learn here. My experience is mostly trial-and-error with lots of research along the way. Through this "log", I hope to share what I've learned so far and provide a starting point for others who may be in a similar situation.
If you want to try a HTML version of this project before reading all of this, you can find it HERE.
Still learning :)
Since I'm still learning I decided to follow a video tutorial. I looked at a couple of different ones, but this one cought my eye. I followed it pretty close, but wanted to try a few things differently just to see if they worked. I ended up with a lot of things being pretty similar to the tutorial, but I also added/removed a few things.
I also documented a few things in the code, mainly as a reminder what some things are used for. There is also a lot of print() debug-data just to see how things behaive and in what order they are executed in. To see all code and download the project, take a look in my Azure repo HERE, but I'll copy a few things here. This is the entire main.gd file:
# A file is a class!

extends Node

# (optional) class definition:
class_name Main

# Global enums could be defined like this:
# -----------------------------------
# enum {LEFT, RIGHT, UP, DOWN}
# Same as writing:
# const LEFT = 0
# -----------------------------------
# But these are local enums:
enum GAME_STATE { WAIT_FOR_BALL_LAUNCH, RUNNING, GAME_OVER, WINNER }

# The @onready... below is shorthand for
# -----------------------------------
# var brick_parent
#
# func _ready():
# 	brick_parent = get_node("Bricks")
# -----------------------------------
# And can easily be done in the editor by grabbing a node in the Scene with a
# left-click, then drag it to the code and just before releasing the mousebutton
# hold down CTRL to generate this automatically.
@onready var brick_parent = $Bricks
@onready var ball = $Ball as Ball
@onready var ui = $UI as UI

# Scenes are templates from which you can create as many reproductions as you'd like.
# This operation is called instancing, and doing it from code happens in two steps:
# 1. Loading the scene from the local drive.
# 2. Creating an instance of the loaded PackedScene resource.
#
# Preloading the scene can improve the user's experience as the load operation
# happens when the compiler reads the script and not at runtime.
var brick_scene = preload("res://scenes/brick.tscn")
var paddle_scene = preload("res://scenes/paddle.tscn")

# Local variables
var viewport_size
var game_state: GAME_STATE = GAME_STATE.WAIT_FOR_BALL_LAUNCH
var brick_count = 0
var score = 0

# The _ready() function is called when the node, and all its children, enters
# the scene tree for the first time.
# Note: _ready() is not the constructor; the constructor is instead _init().
func _ready():
	print("Main:_ready()")

	ball.lock_ball.connect(_on_lock_ball)
	ball.game_over.connect(_on_game_over)

	viewport_size = get_viewport().size
	game_state = GAME_STATE.WAIT_FOR_BALL_LAUNCH
	score = 0

	spawn_bricks()

	# To create the actual node, you need to call PackedScene.instantiate().
	# It returns a tree of nodes that you can use as a child of your current node.
	var paddle = paddle_scene.instantiate()
	paddle.position = Vector2(400, 550)
	add_child(paddle)

# Constructor
func _init():
	print("Main:_init()")

# Called every frame. 'delta' is the elapsed time since the previous frame.
# The _process() would run every single frame, so the amount of times it's
# called can change every second. If the delta parameter is not used,
# prefix the parameter with an underscore as below.
func _process(_delta):
	if(Input.is_action_just_pressed("quit")):
		print("Main:_process() - quit")
		get_tree().quit()
	if(Input.is_action_just_pressed("click")):
		print("Main:_process() - click")
		if game_state == GAME_STATE.WAIT_FOR_BALL_LAUNCH:
			ball.launch_ball()
			game_state = GAME_STATE.RUNNING

# Spawn all of the bricks
func spawn_bricks():
	print("Main:spawn_bricks()")

	var brick_width = Brick.get_width()
	var column_count = (viewport_size.x - 45) / (brick_width + 1)
	var row_count = 7

	for i in range (column_count):
		for j in range(row_count):
			var brick = brick_scene.instantiate() as Brick
			brick_parent.add_child(brick)
			brick.set_position(Vector2(23 + 29 + (i * 58), 93 + 10 + (j * 20)))
			brick.set_row_number(j)
			brick.brick_destroyed.connect(_on_brick_destroyed)
			brick_count += 1
			# The below lines are used for debugging with only one brick
			# if brick_count == 1:
			# 	return

# Callback method for when a brick signal is emitted
func _on_brick_destroyed():
	print("Main:on_brick_destroyed()")

	score += 100
	ui.set_score(score)

	brick_count -= 1;
	if brick_count <= 0:
		ball.reset_ball()
		ui.you_win()
		game_state = GAME_STATE.WINNER

# Callback method for when a game has no more lives
func _on_game_over():
	print("Main:_on_game_over()")
	game_state = GAME_STATE.GAME_OVER

# Callback method for when the ball has been locked to default position
func _on_lock_ball():
	print("Main:_on_lock_ball()")
	game_state = GAME_STATE.WAIT_FOR_BALL_LAUNCH
Collisions
This was a pleasant introduction to collisions, although a bit hard to understand initially.
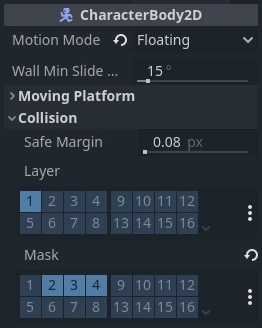
I'm using a CharacterBody2D for the ball.
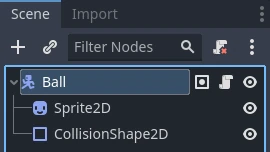
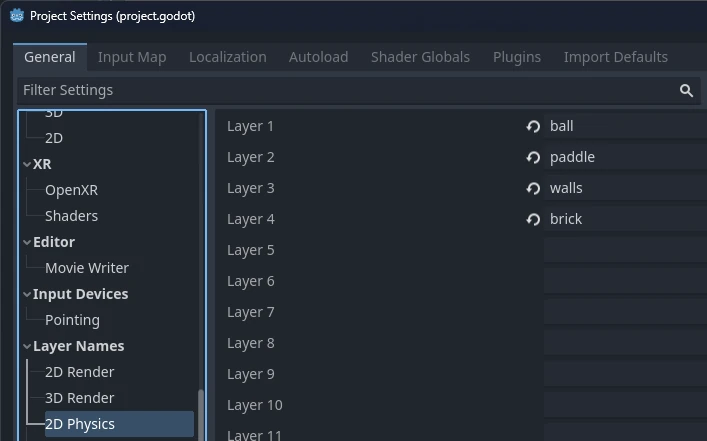
We need to name the different layers.
Here we set what layers this object should collide with.
Setting the collision shape to a circle.
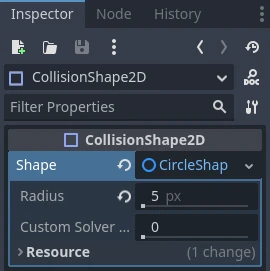
The code that does things
@export var ball_speed = 250

@onready var collision_shape_2d = $CollisionShape2D

func _physics_process(delta):
	var collision = move_and_collide(velocity * ball_speed * delta)
	if(!collision):
		return

	velocity = velocity.bounce(collision.get_normal())
Signals
I have to say that I really like the way signals are implemented and used. For the official documentation, go to https://docs.godotengine.org/en/stable/getting_started/step_by_step/signals.html. There are many pre-defined signals for different Nodes, just look at a small sample from the Button node:
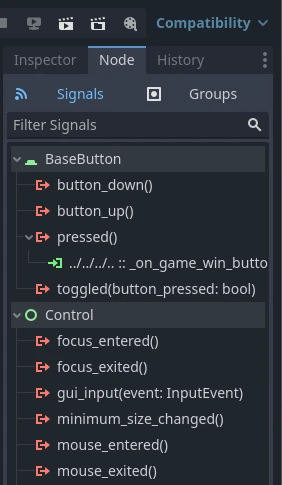
But there is also the option to create custom signals. Here is some code to showcase a custom signal implementation:
ball.gd
signal game_over

func on_life_lost():
	lives -= 1
	if lives <= 0:
		game_over.emit()
main.gd
@onready var ball = $Ball as Ball

func _ready():
	ball.game_over.connect(_on_game_over)

func _on_game_over():
	game_state = GAME_STATE.GAME_OVER
Final thoughts
So I've learned a bit more. Still having problems with the GDScript syntax and formatting, but I guess that will be easier in time. I really like the predefined collision nodes and signals. Soon I will hopefully have a better understanding of how the editor works and interacts with all of the pre-defined Node types.
You can find a playable version of this project HERE, and the Azure repo with the code HERE.
