
Update 2025-03-18: After I wrote this post, Synology has made a number of updates to the DSM. One of those updates are forcing any user that accesses the NAS via SSH to be a member of the admin group. While this is probably great in some aspects, it's less than optimal in this specific use-case. I will keep this blog post up as is, but you should know that it's probably not worth the effort to implement the solution I suggest here anymore. END UPDATE.
I've always been a fan of Synology NAS'es and currently have a DS918+ that I use for a multitude of things. One of those things is using it as a local Git server for random hobby-projects and storing files that I want to be versioned for whatever reason.
First thing: Is this actually needed? Not at all. There are many public free Git services available that can host your projects privately such as GitHub, Azure Repos, GitLab and more. But at the time when I started to look into this many years ago, the only options were to pay a lot of money or to keep the files locally. At the time it was necessary and thats why I started to use it. I don't even make this server available outside my own network, so it's basically just my own little sandbox.
Installation
This is super easy, barely an inconvenience. Just log on to your synology from any web browser (default URL is http://[IpAddress]:5000) with your admin account. Open up package center and scroll down (or use the search function) to find "Git Server". Click the install button and thats it. Once installed, the button changes text to "Open".
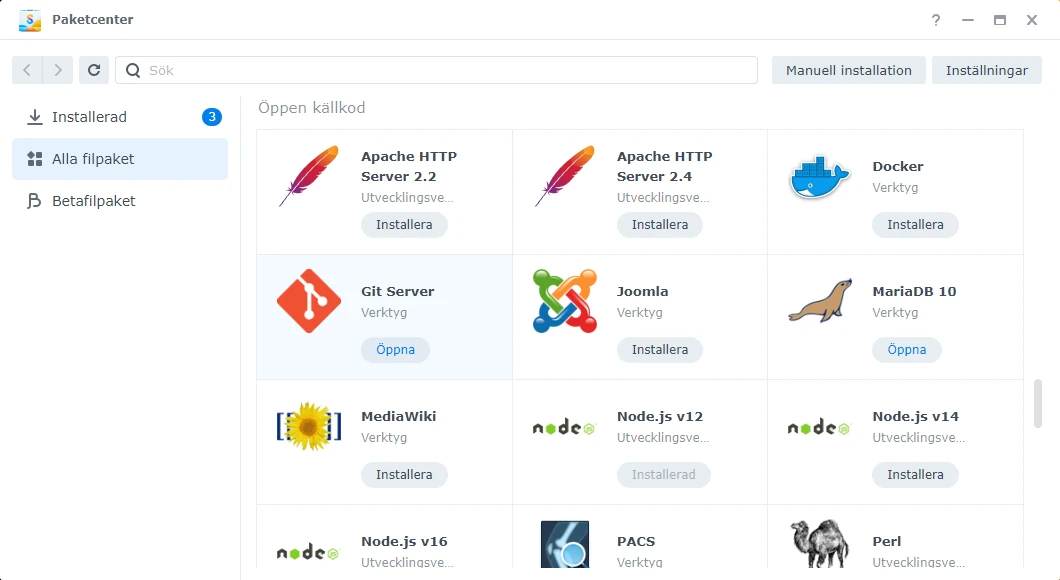 After Git server is installed
User and group
Next, we need to make sure that the account we want to use actually have access to the server. Simply click the "Open" button and a window with a list of users will appear. Select what users you want to have access, and click Apply. Note that admin is checked by default and Guest is unchecked and cannot be edited. You should create an account on the NAS specifically for this access and not use the admin account.
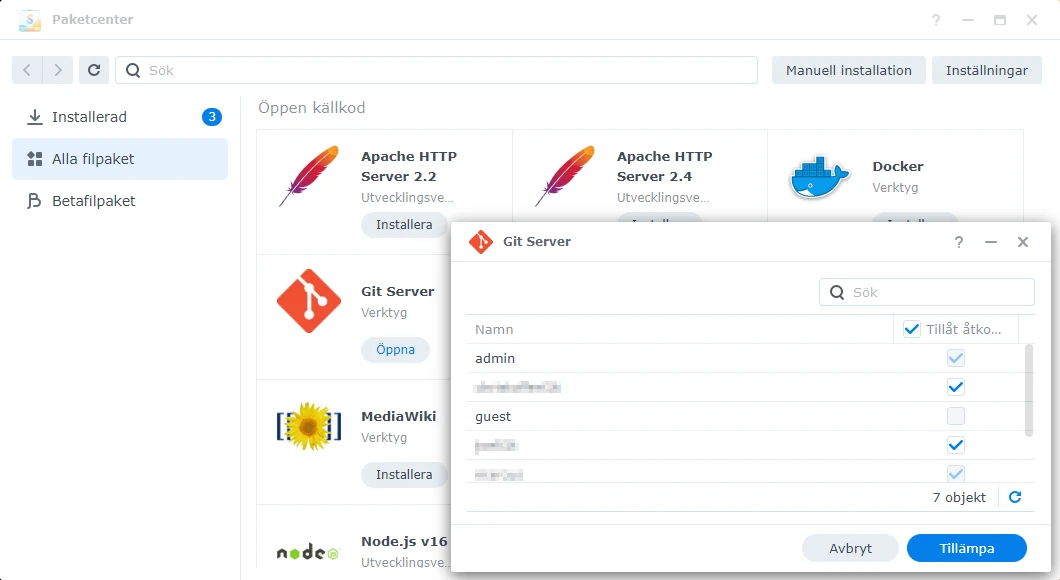 Select accounts to access the server
To create a new user, use the built in functions in the Synology interface. You can find this in the "Control panel" / "Users and Groups". For the purpose of this blog, I'm creating a new user "gitTestUser" as shown below. I'm not changing any of the access options, but leave them all to default.
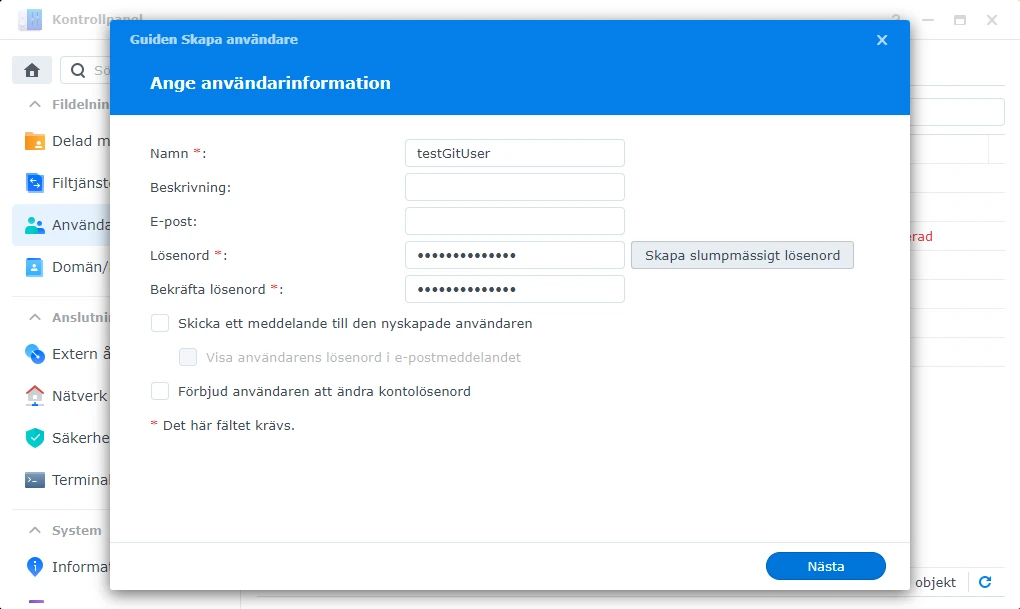 Creating a new user
Next, I create a new group called "gitTestGroup" and make sure to add the new user to this group as well. This is not necessary to make everything work, but makes things easier if you at a later point want to add more users with the same access rights.
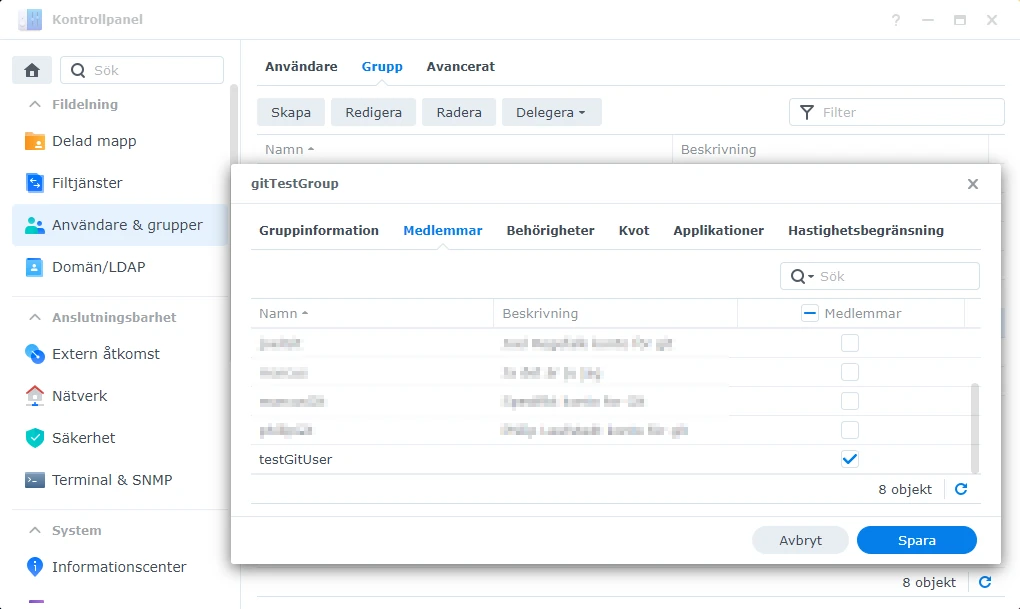 Creating a new group and adding members
The final step for the user setup is to enable access to the Git server. Open up Package Center and locate Git server. Locate the new user and make sure that the checkbox is checked.
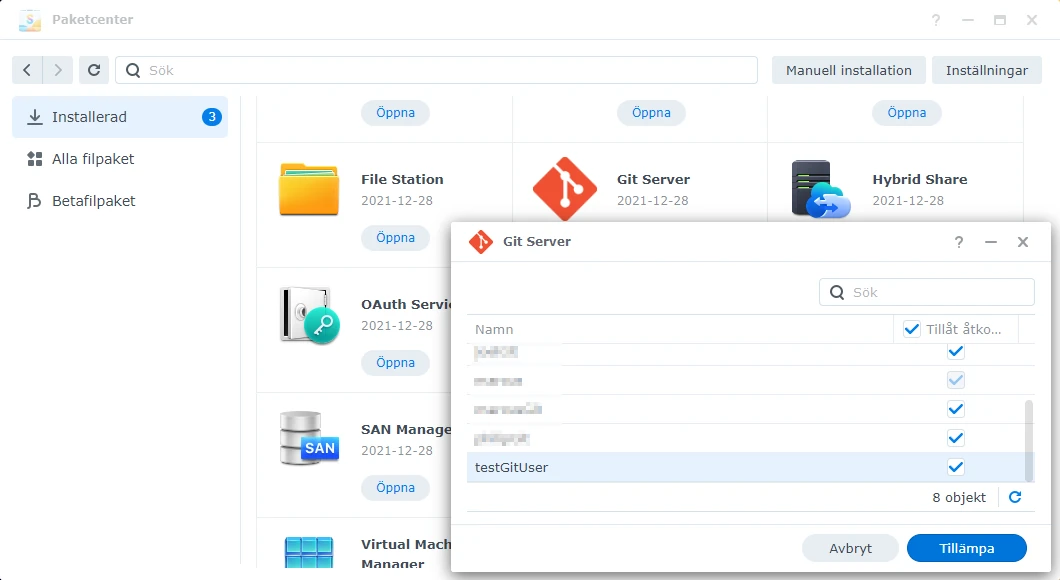 Allow access to Git server
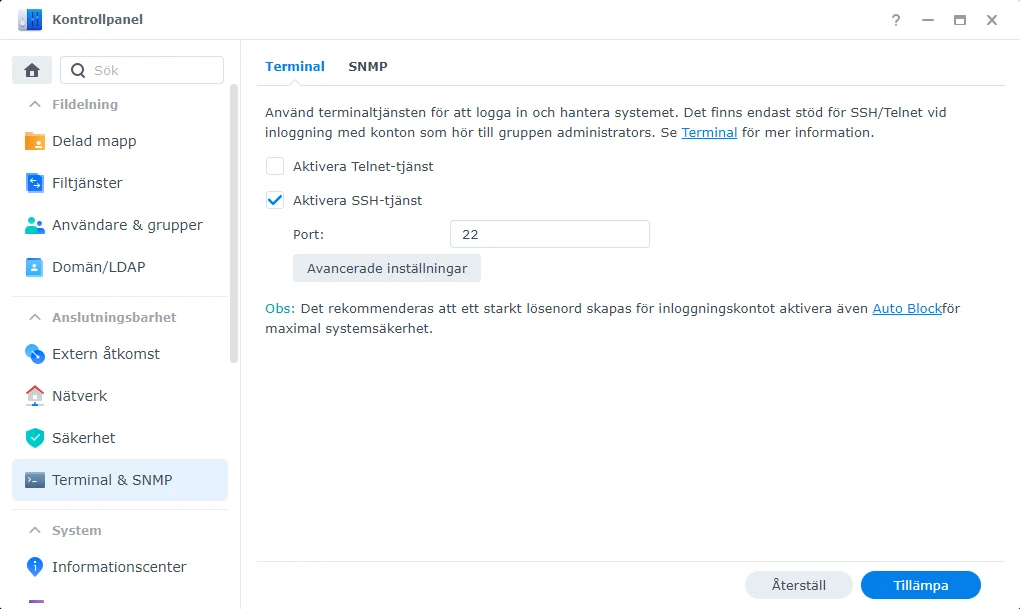
Enable SSH
One thing that you have to do is enable SSH on your Synology. This is done in Control Panel > Terminal & SNMP. Enable SSH service and apply changes.
 Enable SSH
If your NAS is connected to the Internet and the network it's connected to allows traffic in to the NAS, make sure that you use a strong password and at least setup the NAS in a way that handles multiple failed login attempts (Auto Block). Having an open port 22 on the internet will attract unwanted attention from less than trustworthy sources. In my case, I only want the port available to my local network.
Create and init repository
Now we need to create the repository. We need access to the NAS using SSH, and if you are using Windows "PuTTY" works well. Another alternative is using Windows Subsystem for Linux (WSL).
Connect to the NAS using the command below (or using PuTTY's GUI). I'm using WSL so this is basically a ubuntu shell.
$ ssh [AdminAccount]@[NAS_IP]Enter the password for the account you are using and you are connected to the NAS.
Next, go to the location where you want to create the repository. I have a directory located in the standard volume1 that I call Git.
$ cd /volume1/GitIf you dont have a directory called Git, you can simply create one by running the following commands:
$ cd /volume1
$ mkdir Git
Once that has been done, create a new directory for the new repo. I will call my repository "TestRepo", replace it to whatever you want in the command below.
$ sudo mkdir /volume1/Git/TestRepoWe have to specify sudo and enter the password for this operation to elevate permissions temporary.
We might have to change permissions in order to access the directory:
$ sudo chmod 755 /volume1/Git/TestRepoNow we need to navigate to the new directory and run the command to init the repo:
$ cd /volume1/Git/TestRepo
$ sudo git init --bare --shared TestRepo.git
This will init the repository and return some info if everything went well. Now we just have to make sure that the group that we created earlier have write access.
$ cd /volume1/Git
$ sudo chown -R :gitTestGroup TestRepo
Accessing the repo from another computer
Now for the final part. On your computer where you want to access the repository - first make sure that you have a Git client installed. The Git client for windows can be found here: https://git-scm.com/download/win. Then open up a git bash and navigate to the folder where you want the new repository to be located. Or you can right-click in the folder using a file-explorer and select "Git Bash Here". The clone command is git clone ssh://[Git user]@[Your Synology servers IP address or hostname]/[Git repository path]. Change it as needed.
$ cd d:/dev/repos
$ git clone ssh://testGitUser@192.168.0.10/volume1/Git/TestRepo/TestRepo.git
Supply the password for the user when asked for and you should be done. A new folder have been created where you can put all your code. In my case the new folder will be located at d:\dev\repos\TestRepo. To test it - add a new textfile (in my case I'm creating a basic readme.md) to the folder and push it to the server.
MyAccount@MyPC MINGW64 /d/dev/repos
$ cd d:/dev/repos/TestRepo

MyAccount@MyPC MINGW64 /d/dev/repos/TestRepo (master)
$ git status
On branch master

No commits yet

Untracked files:
  (use "git add <file>..." to include in what will be committed)
        readme.md

nothing added to commit but untracked files present (use "git add" to track)

MyAccount@MyPC MINGW64 /d/dev/repos/TestRepo (master)
$ git add readme.md

MyAccount@MyPC MINGW64 /d/dev/repos/TestRepo (master)
$ git commit -m"Added basic readme.md"
[master (root-commit) ab47cac] Added basic readme.md
 1 file changed, 3 insertions(+)
 create mode 100644 readme.md

MyAccount@MyPC MINGW64 /d/dev/repos/TestRepo (master)
$ git push
testGitUser@192.168.0.10's password:
Enumerating objects: 3, done.
Counting objects: 100% (3/3), done.
Writing objects: 100% (3/3), 251 bytes | 251.00 KiB/s, done.
Total 3 (delta 0), reused 0 (delta 0), pack-reused 0
To ssh://192.168.0.10/volume1/Git/TestRepo/TestRepo.git
 * [new branch]      master -> master

MyAccount@MyPC MINGW64 /d/dev/repos/TestRepo (master)
$ git status
On branch master
Your branch is up to date with 'origin/master'.

nothing to commit, working tree clean
SSH keys
OK, so this is working pretty well so far, but entering the password every time you want to do something might be a bit annoying. The solution is to create a public-private key pair and configure the NAS and your computer to use them. More info about this can be found here: https://www.debian.org/devel/passwordlessssh.
First - log into the synology NAS as before. Next - create the .ssh directory if it does not already exist. Go to the .ssh directory of the user. Then run the ssh-keygen command.
MyAccount@MyPC:/mnt/c/Windows/system32$ ssh admin@192.168.0.10
admin@192.168.0.10's password:

admin@DS918:~$ mkdir /volume1/homes/testGitUser/.ssh
admin@DS918:~$ cd /volume1/homes/testGitUser/.ssh
admin@DS918:~$ ssh-keygen
Save the key pair somewhere it's easy to find them. I choose "/volume1/homes/testGitUser/.ssh/id_rsa_testgituser". Enter a passphrase if you want to, but I'm gonna leave it blank. The two files should have been created and you can now download the private file (id_rsa_testgituser) to your computer. Leave the id_rsa_testgituser.pub file where it is.
Next, append the public key to the authorized keys.
admin@DS918:~$ cd /volume1/homes/testGitUser/.ssh
admin@DS918:~$ cat id_rsa_testgituser.pub >> authorized_keys
Then we have to make sure that the user have accessrights to this directory.
admin@DS918:~$ cd /volume1/homes/testGitUser
admin@DS918:~$ sudo chmod 711 . # This requires admin password
admin@DS918:~$ chmod 711 .ssh/
admin@DS918:~$ chmod 711 .ssh/authorized_keys
admin@DS918:~$ sudo chown -R testGitUser .ssh/
Now we need to open and edit the file C:/Program Files/Git/etc/ssh/ssh_config. This requires admin rights. Add the row:
IdentityFile "C:\Users\Drygast\.ssh\id_rsa_testgituser"And after that we are finally done. I tested everything by simply changing a file slightly, performed a commit and then pushed that commit to remote. Everything worked out without asking for a password - great success!